Draw Tools
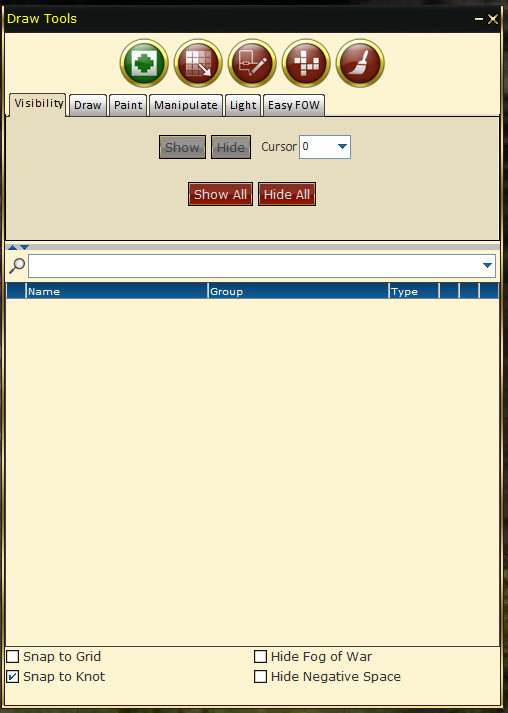
 Mostly used in Tile mapping and art asset placement on maps, this opens a set of tools for managing, placing and working with art assets on maps. It also contains the tools for Fog of War, drawing walls, doors and masks.
Fog of war
Fog of War
 Here you can draw walls, edges, doors and masks. You can manipulate visibility. You can manage lights and other FoW elements. For advanced usage in this section please see Fog of War / Draw Tools
Manage Tiles

Manage Tiles
 Allows for inmporting, layering and placing tiles.
This panel is very similar to the Tile Painter panel, with the exception of a few buttons and number boxes. The tile will expand from the top left corner.
Buttons
- Fill: This causes your tile to fill the entire map. This is really only useful for maps, as basic tiles will become terribly pixelated.
- Show: This button brings the scaled tile to the front, above all other textures or tiles.
- Sink: This drops the scaled tile below other textures or tiles.
- Raise: This elevates the scaled tile above other textures or tiles.
Place a Scaled Image
-
Autoscale: Auto sizes the image when you know the resolution per grid square.
-
1. To place a scaled image, choose the image your library, then click on the map where you want the tile to be. It will initially place it as a 2x2 image, but don't fret. (When Autoscale is not selected)
- 2. If you already have a map image or tile on the map space, you will need to Force Paint by holding the CTRL key while you click.
- 3. To resize a tile you have placed, Right-Click on it and choose Resize. Then set the dimensions you want for it in squares.
- 4. To move a tile into position, simply click and drag it where you want.
Example: So if you want a tile that is 5 wide and 4 high, you choose the image, place the top left corner, then right-click > Resize and type 5 and 4 into the width and height fields.
Working with Tiles
You can do much more with tiles than place them. Right-Clicking on the tile gives you these options:
- Rotate
- Delete
- Resize
- Bring Forward
- Send Back
- Duplicate
- Visible
- Invisible
Paint Walls & Doors
Paint Walls & Doors
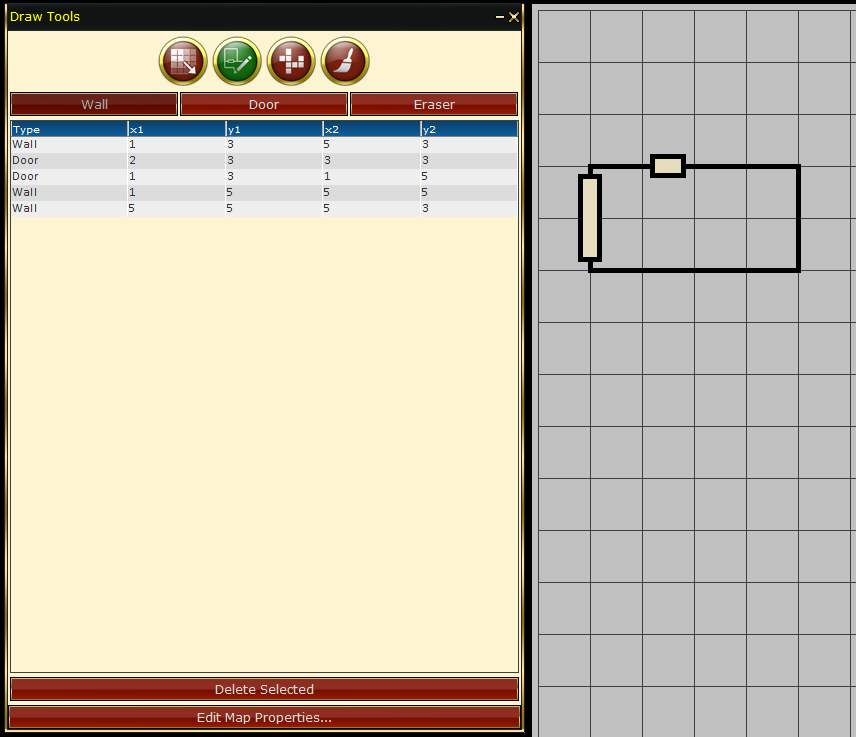
 Paint Walls & Doors. The Wall button allows you to draw straight and diagonal lines on your map. Click where you want the wall to start and drag the mouse to where it will end. As you draws lines they will be added to a list underneath the Wall button with the most recent line being at the bottom of the list. To delete a wall section select it from this list and click the Delete Selected button at the bottom of the pane.
Doors are drawn the same way as walls using the Door button. You can drag the mouse across multiple tiles to make doors larger than one square. Doors will also be added to the list in the middle of this pane and can be selected and deleted just like walls.
The Eraser button will allow you to remove a small part of a door or wall that you've drawn instead of deleting it entirely using the Delete Selected button.
Paint Images
Paint Images
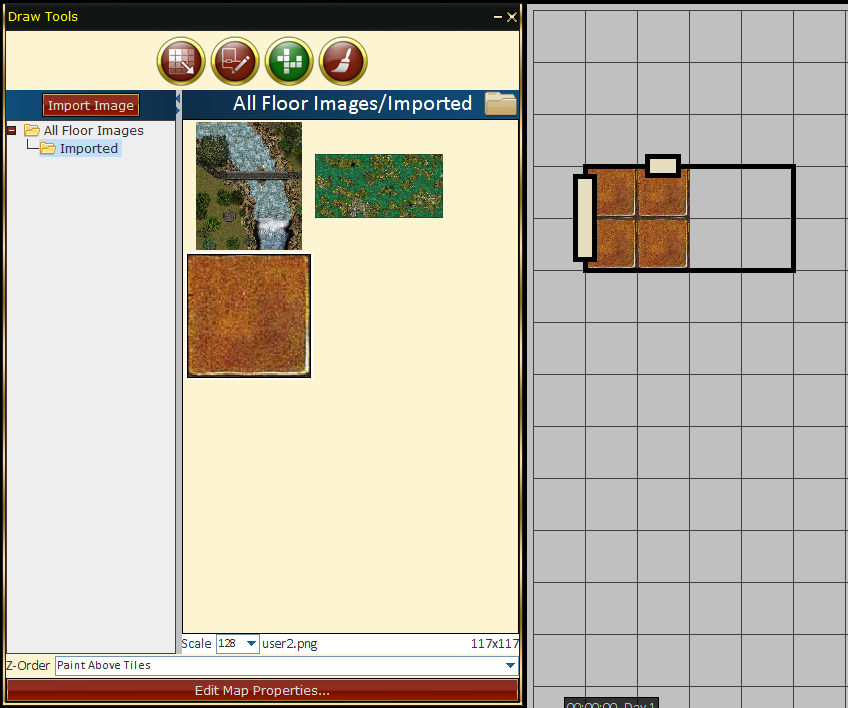
 Paint Images. Paint Images allows you to paint imported images (tile by tile) onto your map. You can add custom images to the tile library by using the "Import Image" button at the bottom of this pane or, to import many images at once, you can copy the image files into your d20pro\judge\campaign____\res\FLR directory. You can create folders withing the FLR directory to better organize these resources. Your custom images may be in GIF, JPG, or PNG format, and should be square for best results. They can be any size, but would be ideally no more than 200 x 200 pixels. See our Utilities section for recommended software or techniques for preparing image files.
Click and drag the cursor to paint multiple tiles. Holding down the CTRL button while clicking on the map will select the color or texture of the tile you clicked on. This is similar to the eyedropper tool on various graphic programs. Holding the SHIFT key while clicking will fill the area with the color or texture that you have selected.
Paint Colors
Paint Colors
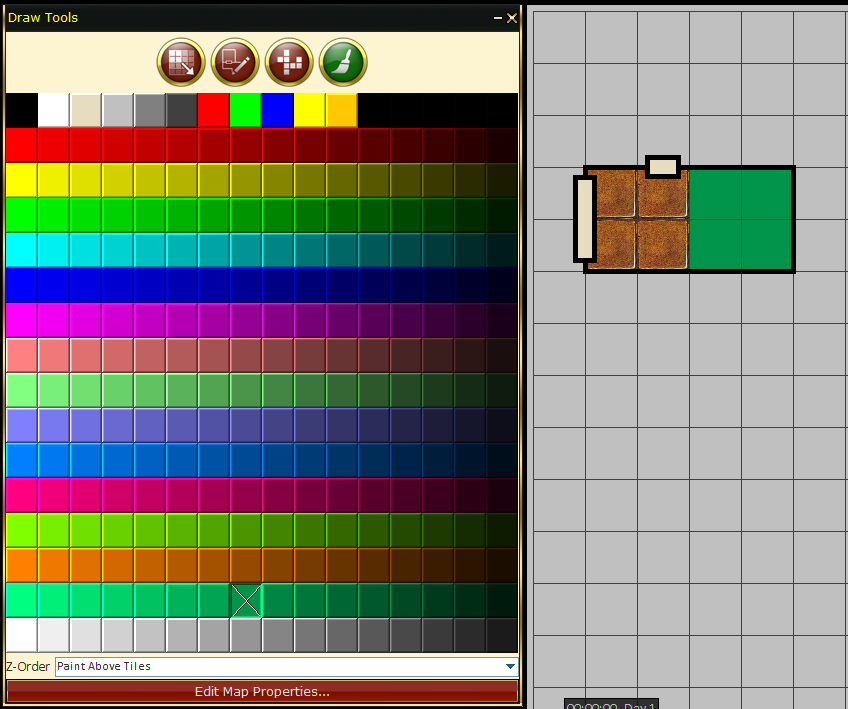
 Paint Colors. Selecting Paint Colors brings up a palette of colors that you can use to paint solid colors on your map tiles. This feature is useful for simple maps or for drawing attention to sections or marking squares for targets.
Click & drag the cursor to paint multiple tiles. Holding down the CTRL button while clicking on the map will select the color or texture of the tile you clicked on. This is similar to the eyedropper tool on various graphic programs. Holding the SHIFT key while clicking will fill the area with the color or texture that you have selected.
Note: The first black (where the current selection is "X") marks the eraser tool.
Z-Order
- Paint Below Tiles: Cells are painted appear beneath all scaled tiles.
- Paint Above Tiles: Cells are painted appear on top of all scaled tiles.