Map Creation
Create from File or Clipboard
Content Library: Maps -> Create -> Video URL
Alarm
This is an Experimental option and is not finished. Results may vary.
Create an map using an Video URL.
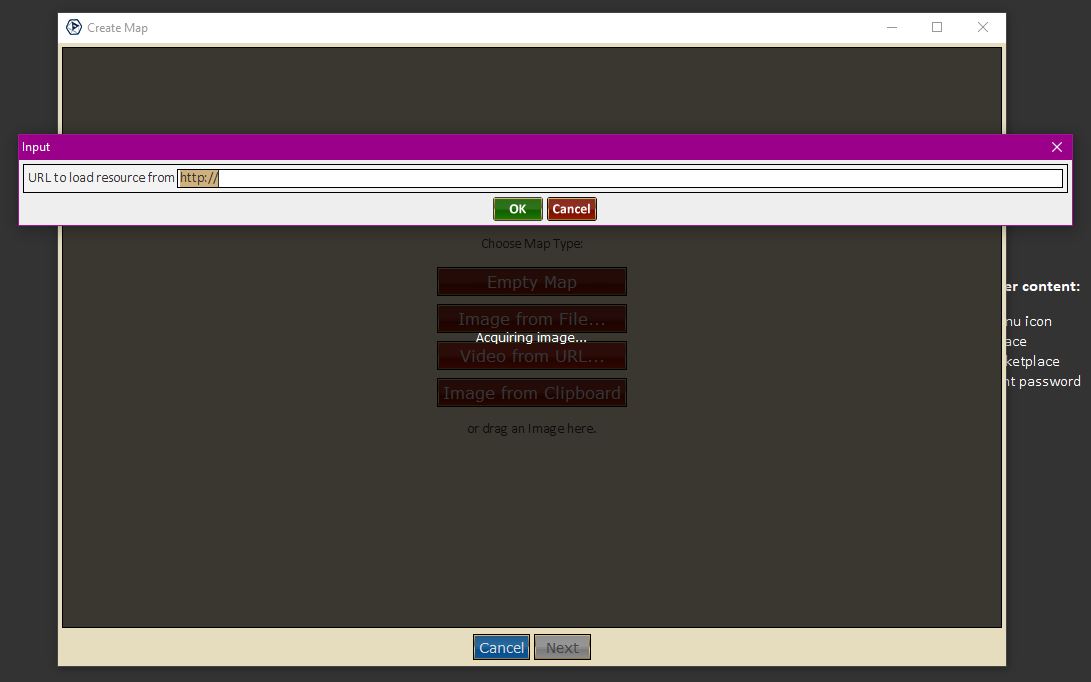
First Step
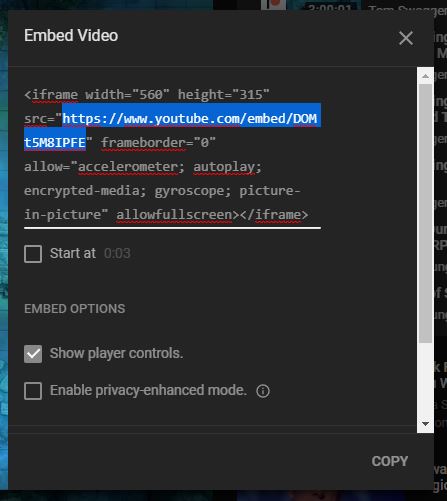
Video URL -> Embed Link
- Video URL: This needs to be the direct vid link. Not the viewer link via site portal. Most site portals have a Share->Embed option where you can find this.
An example video for you to test with; Temple Ruins, Night
Second Step
- Select or Paste: Select and set resolution via prompts.
- Image Offset - Allows adjusting the image position relative to the grid.
- Pixels per Square - Adjusts the size of the grid squares.
- Rescale checkbox - Adjusts the image scaling relative to the grid squares.
- Zoom - Adjust your zoom level while working with the current map.
- Grid & Canvas Buttons - These buttons pull up a Color Picker allowing you to set the color of the selected option.
Third Step
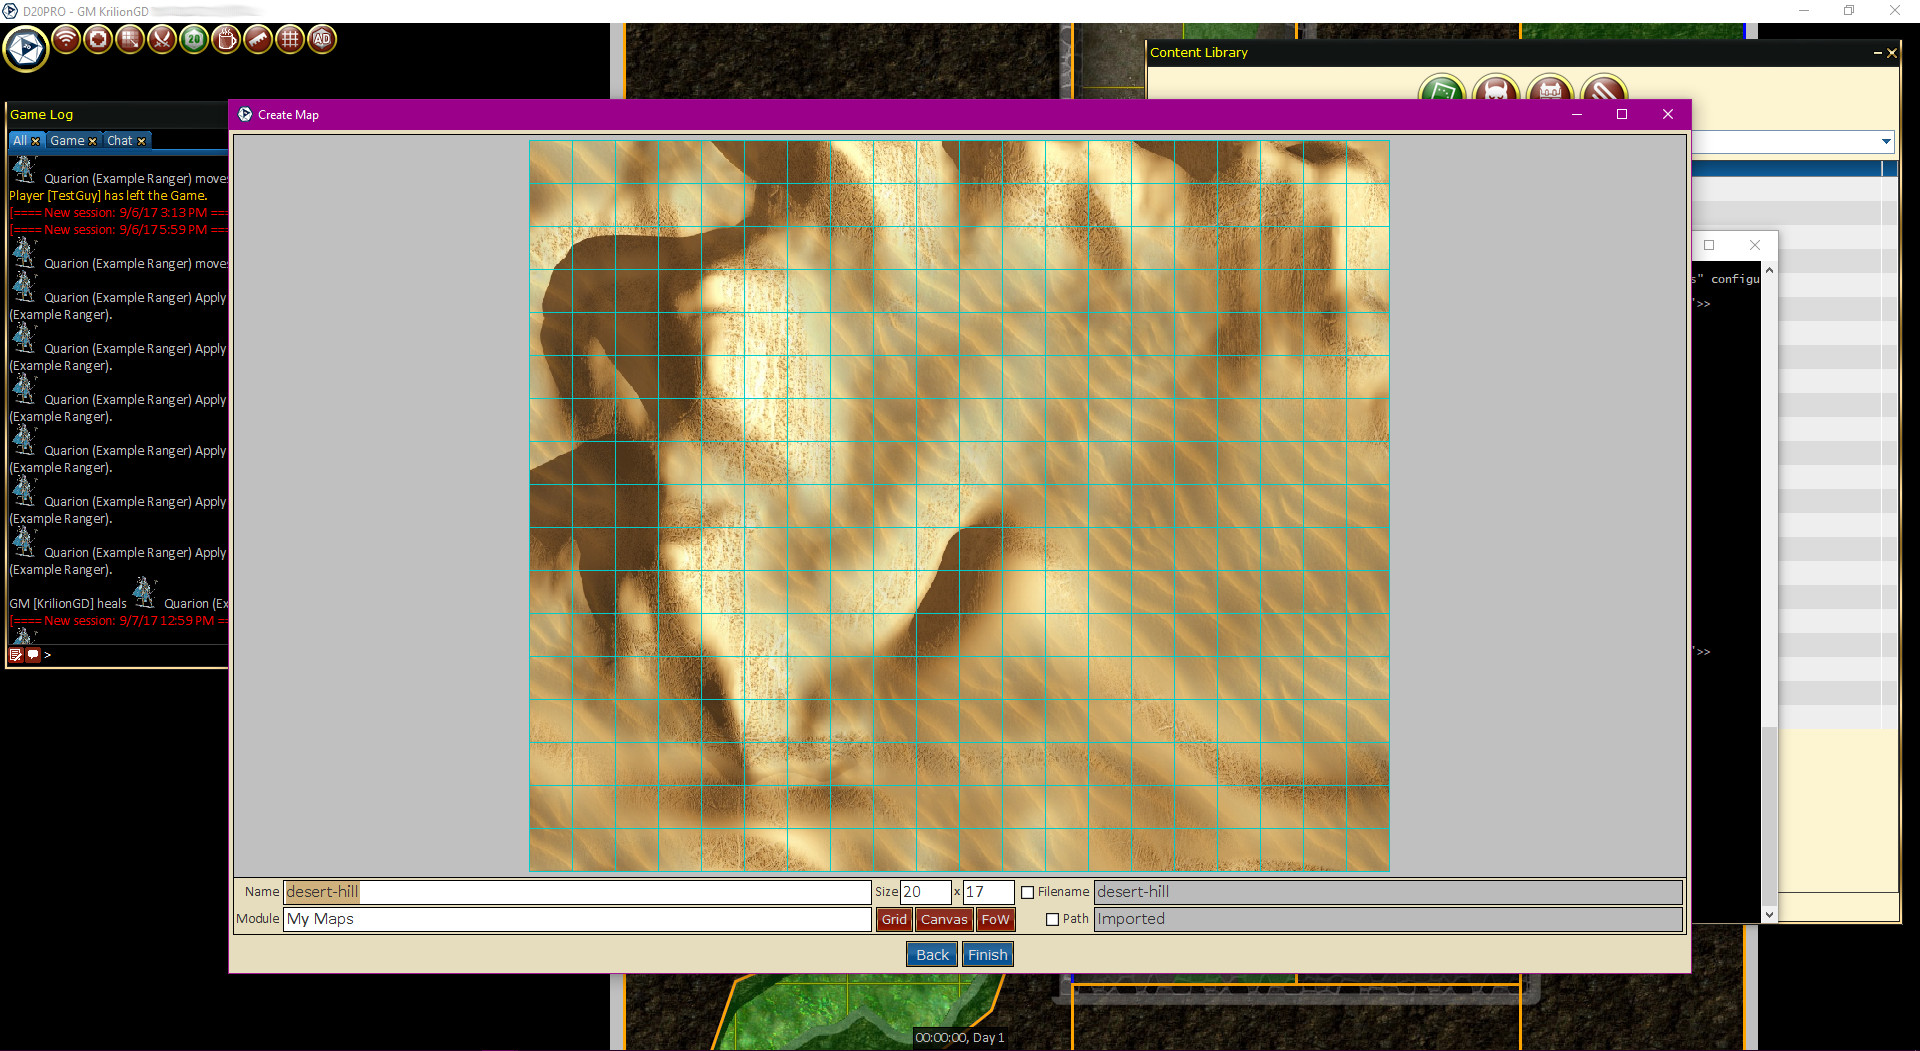
Create -> Video URL Second Panel
This screen allows us to see your work, double check your settings and make any needed last minute changes before saving the map.
- Name - The name as you wish it to appear in the Library and other lists.
- Module - The module the map belongs to. This is helpful for searching your map list and sorting.
- Size - is the map grid XY size.
- Filename - allows you to specify a file for the image.
- Path - URL Link.
- Grid, Canvas & FOW Buttons - These buttons pull up a Color Picker allowing you to set the color of the selected option.